Molding, Part 2
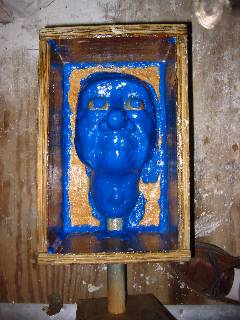
With the head in the box ("S'alright") as shown last night, I have my last oppportunity to make any sculpting corrections. It's my last chance to smooth anything, make any feature changes, and so on. It's also the last chance to ensure that there are no leaks around the head and the subfloor.
One final touch is to put clay in the eyeballs' iris holes. I countersunk those holes so I'd see what the old guy was kind of looking like during sculpture. Now they are potential impediments to the mold making process, so I fill them to the brim with clay.
Next comes the mold release. I use Vaseline petroleum jelly. I smear that goop all over the face, on the subfloor, and on the walls of the mold cabinet. Anyplace where plaster will touch should have a thin layer of mold release so the mold and the clay and wood will separate when the mold has set up.

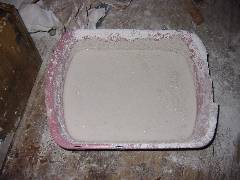
Next I mix the plaster. There are two ways to do that. One way is to weigh the water and the plaster to get the right ratio and mix it up. Another way is to sift the plaster into the water until the plaster stops sinking as shown here.

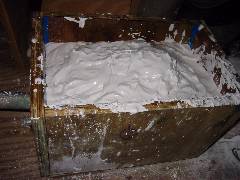
I stir the water and plaster gently until it is thoroughly mixed and has the consistency of thick batter. Then I pour it carefully into the mold cabinet as shown here, ensuring that plaster fully covers the face.

I intended to fill the cabinet to the brim, but I did not mix enough plaster. I used my usual formula, but failed to take into account that Uncle Sweeter's nose is longer than that of the average dummy. This is not a problem, however. I made sure there is a mound of plaster over the nose. The only effect this has is that the mold will not lie flat during casting. It will want to rock around. I can brace it with clay to keep that from happening.
I'll give the mold a day to fully set up. Tomorrow I'll flip it over and do the back of the head.
One final touch is to put clay in the eyeballs' iris holes. I countersunk those holes so I'd see what the old guy was kind of looking like during sculpture. Now they are potential impediments to the mold making process, so I fill them to the brim with clay.
Next comes the mold release. I use Vaseline petroleum jelly. I smear that goop all over the face, on the subfloor, and on the walls of the mold cabinet. Anyplace where plaster will touch should have a thin layer of mold release so the mold and the clay and wood will separate when the mold has set up.

Next I mix the plaster. There are two ways to do that. One way is to weigh the water and the plaster to get the right ratio and mix it up. Another way is to sift the plaster into the water until the plaster stops sinking as shown here.

I stir the water and plaster gently until it is thoroughly mixed and has the consistency of thick batter. Then I pour it carefully into the mold cabinet as shown here, ensuring that plaster fully covers the face.

I intended to fill the cabinet to the brim, but I did not mix enough plaster. I used my usual formula, but failed to take into account that Uncle Sweeter's nose is longer than that of the average dummy. This is not a problem, however. I made sure there is a mound of plaster over the nose. The only effect this has is that the mold will not lie flat during casting. It will want to rock around. I can brace it with clay to keep that from happening.
I'll give the mold a day to fully set up. Tomorrow I'll flip it over and do the back of the head.


0 Comments:
Post a Comment
Subscribe to Post Comments [Atom]
<< Home